Thursday, 9 August 2012

Making our Candles Part 4

Packing


Just a note on the care and time that goes into packing our candles.
Candles are very delicate and bruise very easily. Because the majority of our candles are sent via post or courier they can take a bit of a bashing so I wrap and package them so carefully.

Firstly with some polystyrene foam.
Wrapping - 1st layer - polystyrene foam
In polystyrene foam with Glo logo

 Then with some small bubble wrap.


2nd layer - small bubble wrap

 Then with some large bubble wrap.


3rd layer - large bubble wrap
In large bubble wrap


Sometimes they are packed in boxes like this but sometimes a layer of corrugated card is added before sealing in a plastic mailing bag.


Having taken such care making the candles the last thing we want is for them to arrive damaged, so this is an important part of the process. We don't make any profit from package and postage and are happy to receive glowing comments about the condition of the candles when they arrive at their destinations.

So that's it. Amopther time I will show you how we make some of our scented / aromatherapy candles.

If you ever have any questions please ask. We are always happy to show you around if you want to come and visit. Just contact jane@glocandles.co.uk


Making our Candles Part 3

Finishing Off - Pillar Candles

Once the candle is out of the mould we check for blemishes. Some can be rubbed out with a tea towel. As the candles are solid colour all the way through and not dipped we can rub pretty hard to remove marks and flaws.

Small water bubbles or white marks can be removed by using a hairdryer. This essentially melts the wax a little but when it cools down again it returns to the colour of the wax used.

Waiting to be finished


Checking straightness and
smoothing the bottom
A word about bottoms:

The bottom of the candle is in fact the top that you saw in the open mould. It is usually quite rough and needs flattening and moothing off. Candles of 75mm diameter and more are gently placed on a metal heated plate that melts excess wax and smooths it down. 75mm and under go under the rotary saw to make sure they are straight.
We then place a sticker with all important burning and safety instructions on the base.


The saw
Cutting the candle base


.


Polishing

TOP TIP!

I polish the finished candle with a shoe shiner which removes any smudges and fingermarks and gives it a beautiful sheen. Now all ready for packing.

Polishing the candle


Next time - not very exciting but I want to share how carefully every single candle is packed so it reaches you safely.


Friday, 20 July 2012

Making our Candles Part 2

Melting & Pouring - Pillar Candles


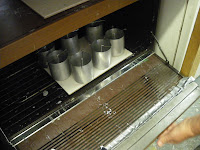
Whilst the moulds are being wicked the wax granules have been in a sort of bain-marie melting.
Any dye that needs to be added to the wax is added at this time and stirred in. This is dependent on the colour of candles that have been ordered.

Melting & Pouring area
Melting jugs in bain-marie
When the wax reaches 80-84 degrees Centigrade (depending on wax type used) it is ready to pour. But before we do we need to warm the moulds in a heater. They don't need to stay in for long; around 5-10 minutes, raising them to 30-35 degrees Centigrade.

Heating the moulds


Wax ready to be melted
Reaching the right temperature


Pouring
Still pouring


The wax is poured very carefully into the mould so as not to create air bubbles. We fill to to the very top taking care not to spill over. This is then left to cool, usually the next day. As the wax cools it shrinks and visibly dips in the centre. The candles need to be topped up - sometimes several times - being very careful not to come over the level of the original wax.

Wax poured to top


With larger candles the surface skin is pierced to prevent air bubbles inside the finished candle. See below:

Topping up - see how the wax has shrunk


When the candles are totally cooled they are ready for the big reveal.
Sealing putty and tape are removed from the bottom and the wick is again visible. A sharp tap should release the candle, but as often as not the candle needs to be placed in a fridge to cool a little more. It is then easier to release.


The Moment of Truth

This is the moment of truth. Until the candle is actually out of the mould we never know if it is a good candle or not. Some minor blemishes are natural with hand poured candles and we have ways of improving the finish (more on that next time). If they look as though they have been run over by a truck or aren't going to pass my quality control then it's back into the jug to be melted and made again. Sometimes little blemishes such as one teeny drop of water can cause enough of a blemish for me to refuse to send a candle out.

NEXT TIME: It's all about bottoms and finishing off


Tuesday, 12 June 2012

Making our Candles Part 1

Preparing the Moulds

I thought I would share with you the way we make our pillar candles. There are many steps and every candle is lovingly hand poured. We take great care every step of the way - there are so many things that can go wrong so we put a lot of effort into making sure things go as smoothly as possible.


Clean aluminium moulds on the shelf


Wick (cotton) is inserted into hole in mould


Wick is pulled through and wick pin is pushed through the wick
The wick pin holds the wick central and straight
Mould is turned upside down to secure the wick
Wick is secured using plastic tape


White tac is used to seal wick down (to stop wax escaping after it is poured in)

Mould is now ready for the pouring process (see other shapes in background)


NEXT TIME: Melting and Pouring


Wednesday, 21 March 2012

Candles for Spring and some new colours

Well it seems as though Spring is well and truly here. The sun is shining , the sky is blue and all the daffs and primroses are out and all is good with the world.

See our new egg candles - made of mottled wax but of course we can make any colour you like (although the mottled wax works best in a cream colour). These will go down well for Easter.


With all this talk of primroses we have a brand new Primrose Yellow candle - such a fresh, happy colour. This along with a new Purple, Peppermint Green, Lime Green, Peach and Raspberry.


Primrose Yellow

Peach

Peppermint Green

Purple

Raspberry


As always we can make any shape or size from our repertoire in the colour of your choice! We now have 37 colours to choose from as well as our colour matching service which is going really well, especially for brides who can't find the colour candles in the shops. I love to think that in a small way, we are part of their wedding day.

Please follow us on Facebook or Twitter and sign up for our blog updates.


Peach candle arrangement by Sharon of S Cooper Floral Design


Primrose Yellow 50mm Trio

Monday, 16 January 2012

Happy New Year!

A belated but nonetheless very Happy New Year to to you all.

We have just had our first Xmas and experienced the rush. To be honest we had no idea what to expect but about 5 weeks before Xmas the order started flying in. We hardly had time to stop and take a breath. Thanks to eveyone who placed orders with us. Royal Mail did us proud, unlike a courier company who shall remain nameless, that we dropped a few weeks prior to Xmas. As far as we are aware only one parcel never arrived over the holiday period and most arrived at their destinations in double quick time according to our ebay feedback.

Then just as suddenly as it had started the orders stopped. It seems that although we were geared up to keep going at a mnaic pace until the last first class post had departed on 21st December the majority of customers stopped a week before that. It was a gentle last week of posting but our aim was to fulfill all orders and we succeeded.

After a  lovely festive break we expected January to be really quiet but 'No'. New Years Eve the order started flooding in again (maybe because it was a Saturday and everyone was hitting the Internet before getting ready for their New Year's celebrations. And it hasn't stopped since. So much for being able to take a breath and do a stock take and a spring clean. (I'm sure we will get around to all that at some time)

And now we are in the midst of preparing for Valentines Day. We ordered some moulds from Germany as they seem a lot more into candles than we are with amazing selections of moulds and fantastic ideas wbout what to do with a basic candle. The moulds arrived last week and here are our Valentines candles - again a huge thank you to Sharon of S. Cooper Floral Design, who has made them look extra pretty!

Pillar Heart


3D Heart


These are available on our site www.glocandles.co.uk

KSYP4JAMX8RS